Know-How to Restore Database From Suspect Mode?
Are you looking for a prominent solution to restore database from suspect mode? If yes, then read the post, because this post is intended for all those users who want to know why SQL database goes into the suspect state and how to fix suspect database in SQL Server 2019, 2017, 2016, 2014, 2012, 2008, 2005, and 2000?
Nowadays, Microsoft SQL Server is one of the widely used relational database management systems. While working with it users are stuck in a critical situation – when they try to access their database, they find out it is gone into the suspect state which makes the database inaccessible and also restricts users to perform any action on that database until it comes back to online mode.
This suspect mode indicates that the database’s primary filegroup is corrupted, in such a situation you will not be able to connect to the database or recover it during the server start-up. So, in this write-up, we are going to disclose the best solution on how to restore database from suspect mode? But before that, let see-
Why SQL Database Goes into Suspect state
- Due to Virus or malware attacks on the database.
- Crashing of SQL database files.
- Due to system failure where Microsoft SQL Server is installed.
- When SQL database files (MDF&NDF) got damaged or corrupted.
- Sudden power outage, hardware failure, or improper shutdown of the database server are also responsible for this issue.
Now, let’s move towards the solutions to resolve this issue.
Manual Steps to Restore Database From Suspect Mode
Follow the below-given instructions carefully to repair suspect database but sometimes this method could not work and unable to fix this issue:
1. Firstly, launch SQL Server Management Studio (SSMS) on your PC and connect to the databases.
2. Open a new query page and use the script below-mentioned.
Note: Replace [YourDatabase] with the name of your database.
EXEC sp_resetstatus [YourDatabase];
ALTER DATABASE [YourDatabase] SET EMERGENCY
DBCC checkdb([YourDatabase])
ALTER DATABASE [YourDatabase] SET SINGLE_USER WITH ROLLBACK IMMEDIATE
DBCC CheckDB ([YourDatabase], REPAIR_ALLOW_DATA_LOSS)
ALTER DATABASE [YourDatabase] SET MULTI_USER
3. Now, click on Execute button.
Done! Your database is longer be marked as suspect. But, if the problem is still not resolved then to deal with this situation, you can opt for the SQL Recovery tool.
Best Alternative Way to Restore Database From Suspect Mode
The above-mentioned manual method is not as easy as it may seem. It requires granular technical knowledge and sometimes does not provide successful results. In that case, users are suggested to use SysTools SQL Database Recovery tool. It is an advanced solution to repair Suspect database in SQL Server within few steps. Along with this, you can also recover permanently deleted database components like tables, views, indexes, functions, triggers, procedures, etc.
Now let us explore the working of the tool:
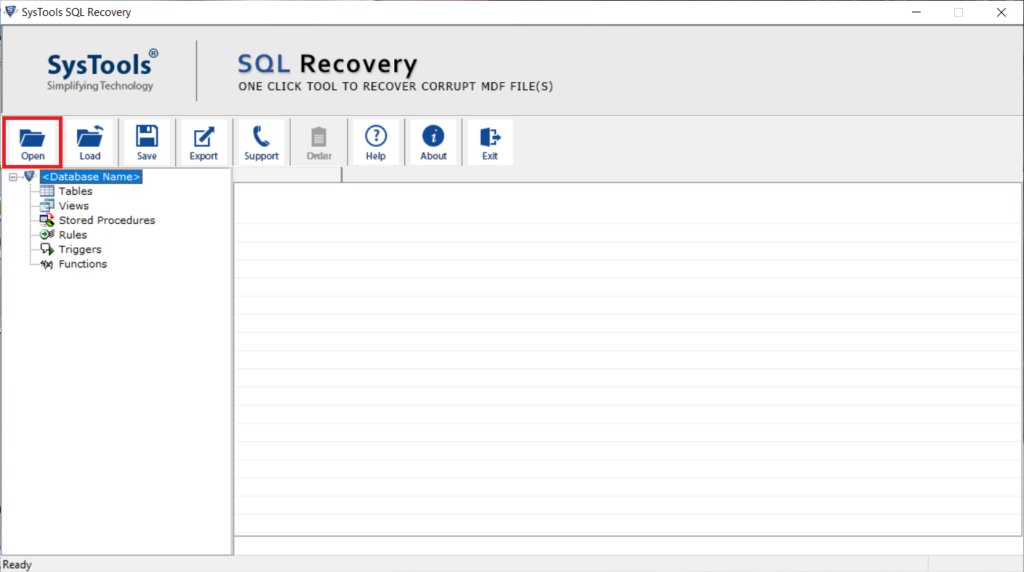
Step 1. Download, install and launch the SQL Recovery tool in your system.
Step 2. Load the database file using the Open button

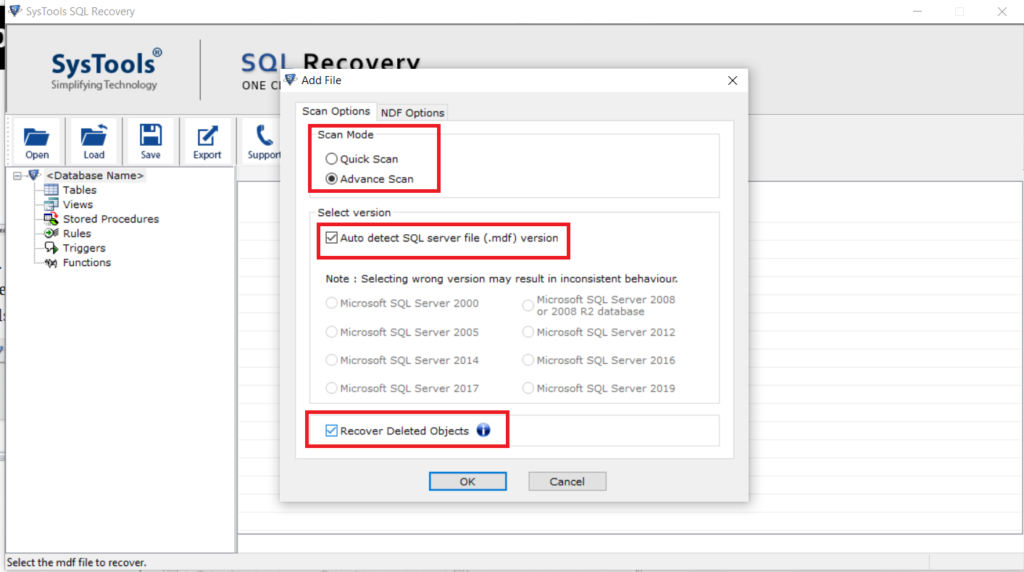
Step 3. Now, choose scan option and select the server version of the MDF

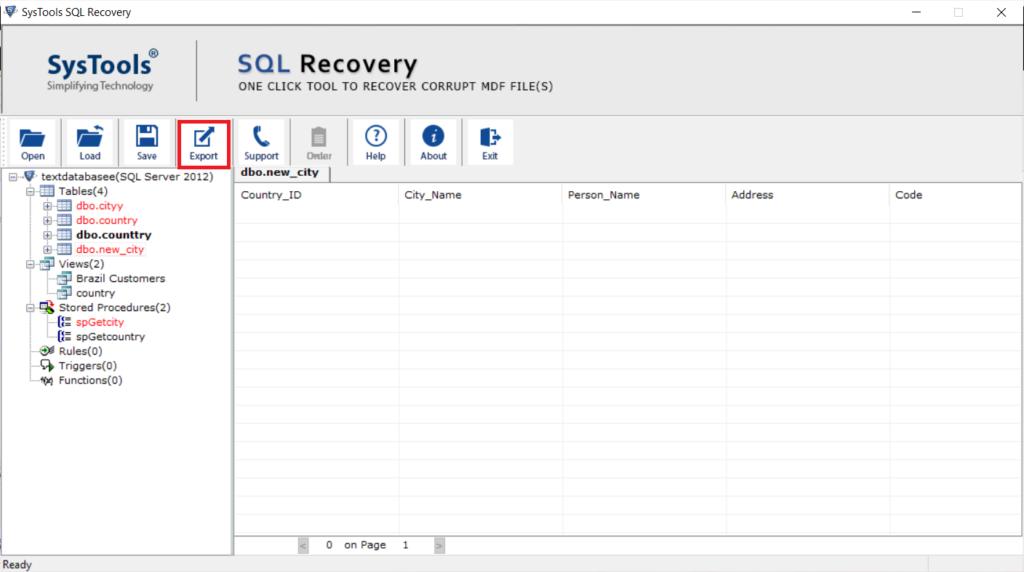
Step 4. After this, the tool provides a preview of the recovered database. Then hit the Export button

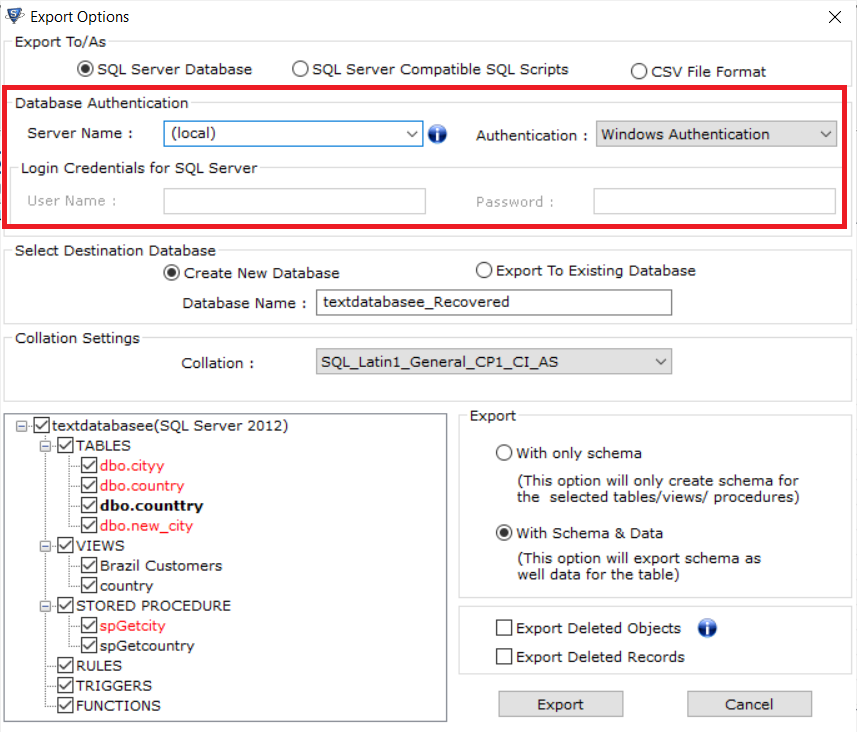
Step 5. Choose an export option from SQL Server Database, SQL Server Compatible Scripts, and CSV file.

Step 6. Select the desired database items you want to save and finally click the Export button.

Read More: Restore Table Data From Database SQL Server
Wrapping up:
Well, in this post, we have discussed manual and automated solutions to restore database from suspect mode. However, the manual method is not reliable to repair suspect database as it is not successful in all cases also it involves a lot of brainstorming effort. So, we recommend to go straight with the automated solution and easily repair your SQL database without any hassle or data loss
Related Posts


