How to Export Emails from Office 365 to PST? Step by Step Solution
“Hey, I am using Office 365 since 2017. I have lot of emails in my Office 365 account. But now due to some personal reasons, I do not want to use Office 365 anymore. I want to export emails from Office 365 to PST. So, would anyone please give me a perfect and the best way to do so?”
How to Export O365 Emails – Navigation Panel
Use of better email client and servers become popular among users for better services. Office 365 is one of the most used cloud-based software as a service. It is a method of software delivery in which users can access the software via subscription plan rather than bought it their local machine.
On the other hand, the users who are more concern about their email data which is stored on the server should save their mailbox data locally as well. Because the data stored on the cloud is not 100 percent safe and secure. So, the best way for securing cloud data is to download it locally.
Hence, in this article, we are going to give you the step by step procedure to export all emails from Office 365 to Outlook supported PST file.
Export Emails from Office 365 to PST Manually
In this section, we are going to see two manual methods that will help you to download all O365 emails.
#Method 1: Export Office 365 Emails to PST Via eDiscovery
In order to use eDiscovery, you will require permission from the administrator. Because only administrator can operate eDiscovery tool. And, users must consider the listed things before using eDiscovery:
- eDiscovery only work on Windows 7 and above.
- Microsoft .NET framework is mandatory to use eDiscovery.
- The latest updated version of Internet Explorer is required.
Working Steps
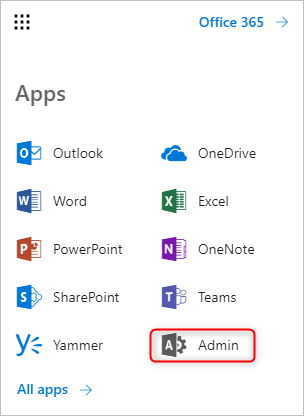
Step 1: First login to your Office 365 account and click on Admin.
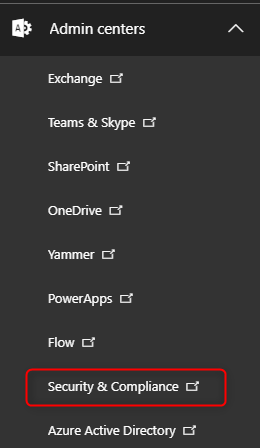
Step 2: Now, click on Admin >> Security & Compliance.
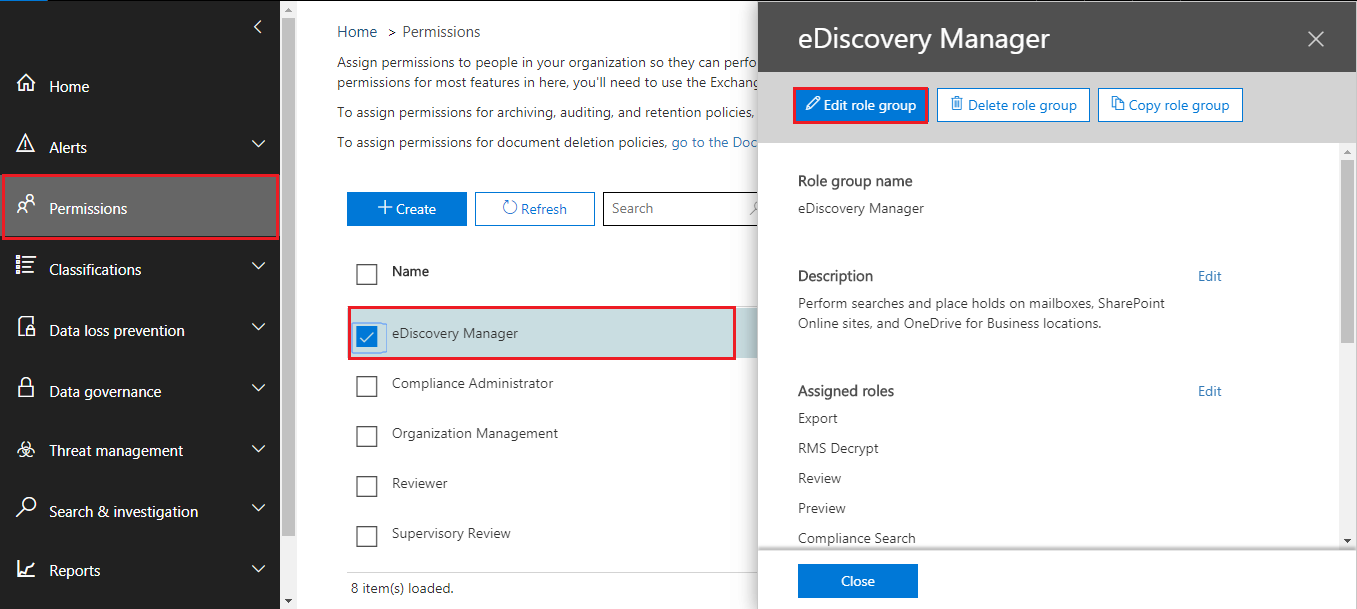
Step 3: After that, go to the Permission and check the eDiscovery Manager option. And always make sure that the role of Export is assigned. If it is not then, click on edit to assign it accordingly.
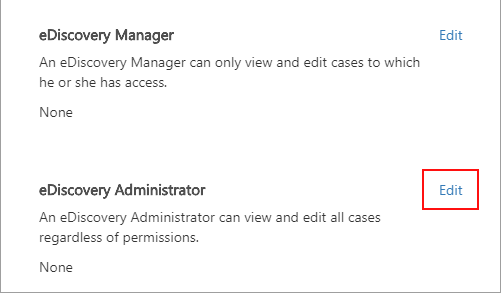
Step 4: Now, click on Edit corresponding to eDiscovery Administrator and then continue to add new user.
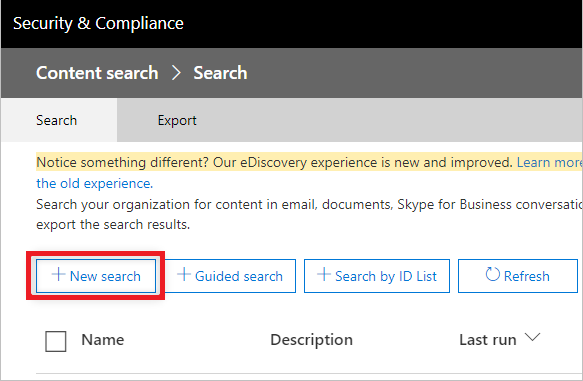
Step 5: After that, go to Search & Investigation tab >> Content Search >> + New search button to open the content search wizard.
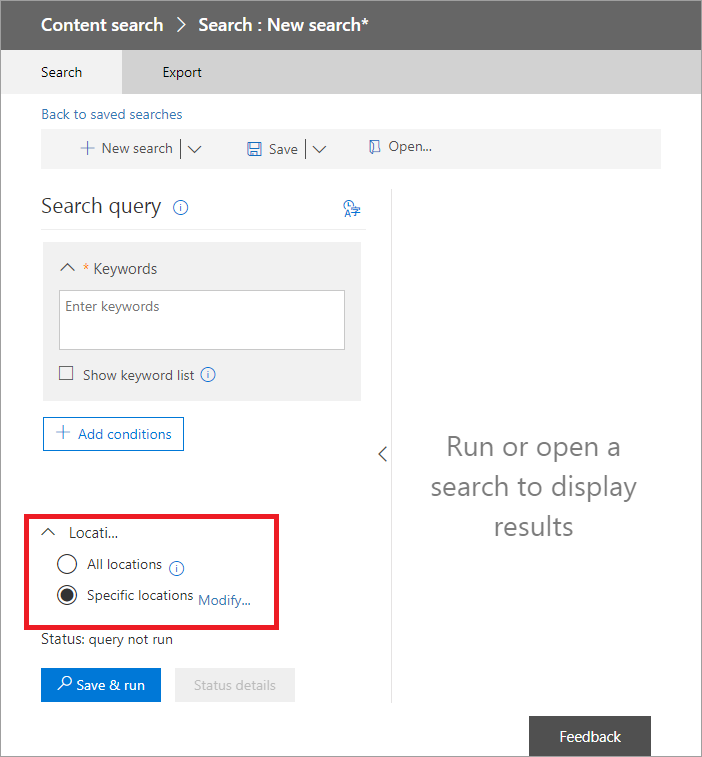
Step 6: Now, this wizard lets you search specific mailbox data to export later. Choose from the given location option.
All locations – This option will scan and export the entire public folders and Sharepoint database along with Exchange Online.
Specific location – Click on modify to specify particular locations to save data from.
Note: – There are various filters available with this export process like location filter, condition (date, sender, size, etc) and keywords(AND, OR, etc).
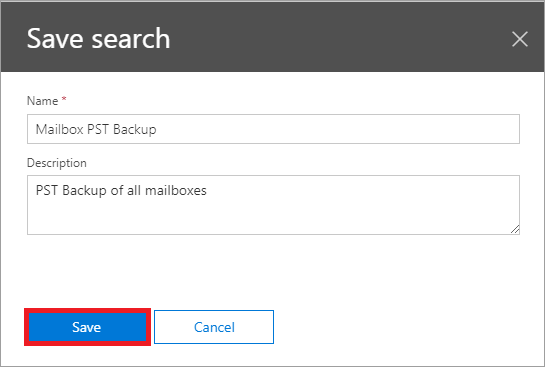
Step 7: Now, click Save and run, then enter the Name of your search along with the description and click on Save button.
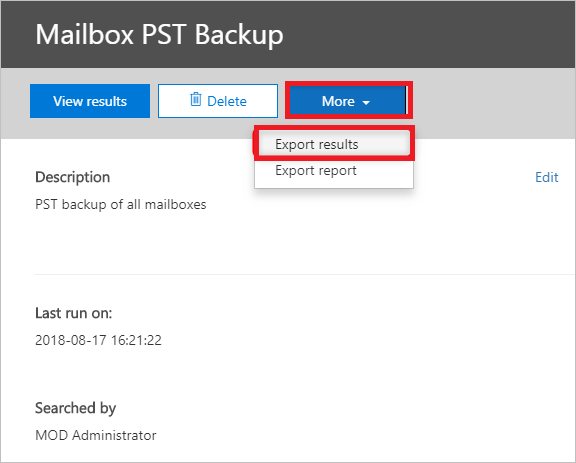
Step 8: After that, go back to Content Search, refresh and then choose your result >>More>>Export results.
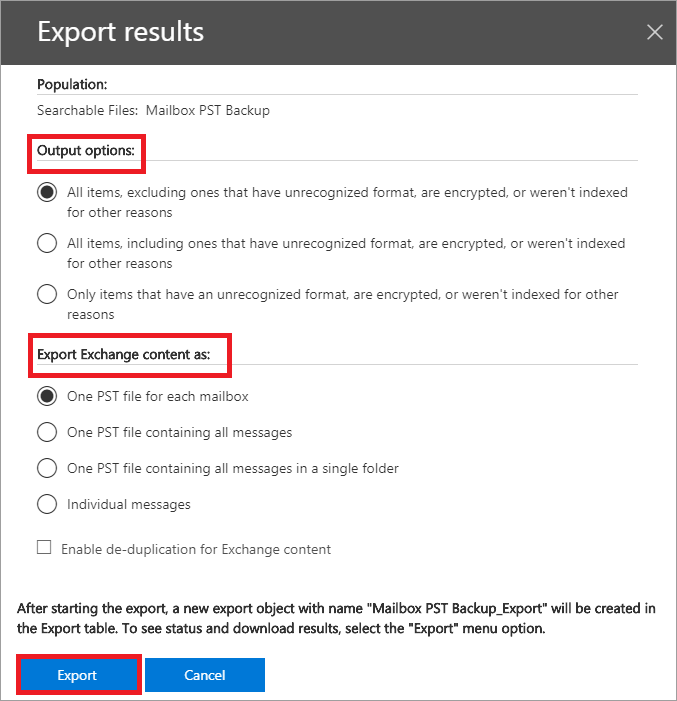
Step 9: Now, choose from the list of export options as per your requirement and click on Export button.
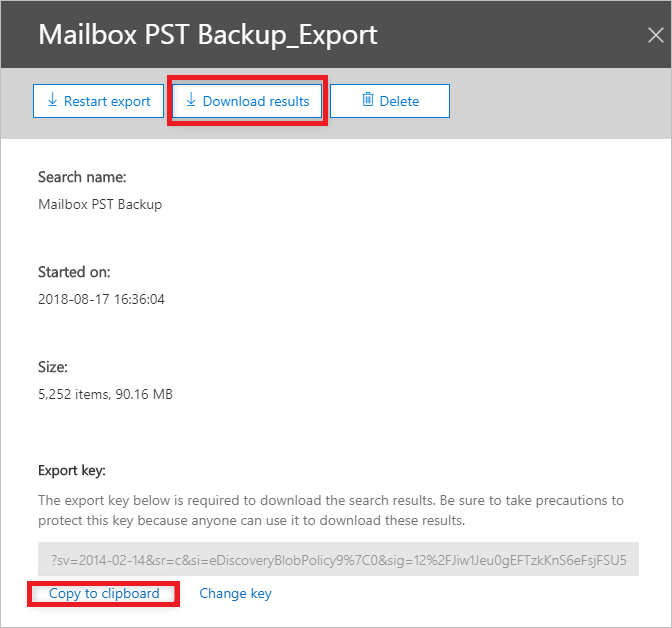
Step 10: Click on Download results and click on copy to clipboard option to copy export key.
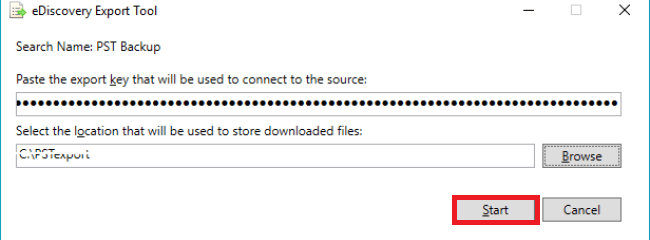
Step 11: Now, eDiscovery PST export tool will start running. Here, paste the copied export key.
Step 12: After all settings, choose the destination location to save resultant PST file and then click on Start button.
Method 2: Export Emails from Office 365 to PST Via Outlook Desktop Application
You can also save email with the help of desktop version of Microsoft Outlook. This manual approach is much easier than eDiscovery. So, follow the below steps to complete the export process.
Step 1: First, configure your Office 365 account in Outlook.
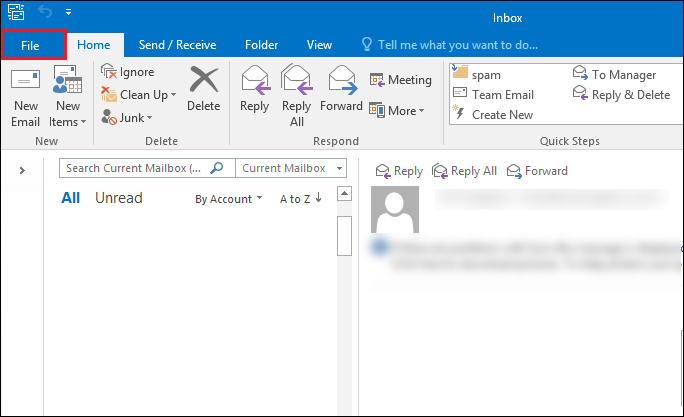
Step 2: Now, go to File menu.
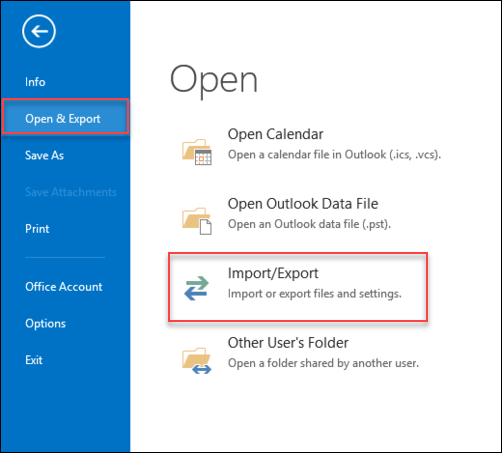
Step 3: After that, select Open & Export >> Import/Export.
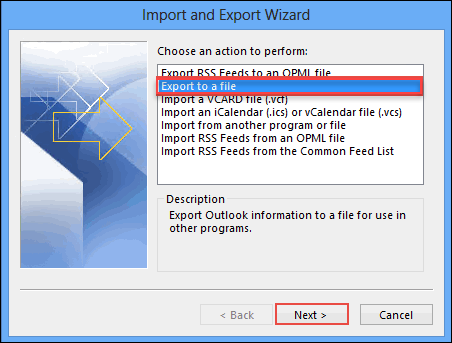
Step 4: Now, choose Export to a file option under Import and Export Wizard and then click on Next button.
Step 5: Select Outlook Data File (.pst) to export Office 365 emails into PST file format.
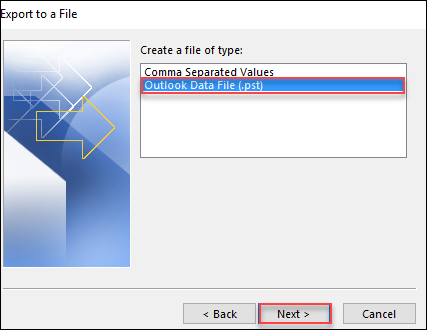
Step 6: Check the option include subfolders and click the Finish button to start the exporting process.
Obstacle While Using Manual Solution
The manual approach of exporting Office 365 emails to PST has its own limitations which are listed below:
- The process is lengthy and time-consuming. Moreover, the steps are very complex and confusing to understand.
- eDiscovery has a problem of hanging and it show error while export process such as:
- Application not Starting Error
- Fail to Search Mailbox Error
- Export complete with Some Error Status
- Users need to have technical knowledge in order to use eDiscovery.
Automated Solution to Export Emails from Office 365 to PST
As we said above, the manual approach has its own limitations. Hence, to complete the exporting process in effective manners then, try some automated method. Office 365 Export Software is the most reliable tool to Office 365 export mailbox to PST.
Key Features of the tool:
Export Emails from Office 365 to PST – This software is capable to export bulk emails from Office 365 mailboxes to Outlook PST. All you have to do is log in by entering your Office 365 credentials. Moreover, this tool also offers users to migrate contacts, calendars, and tasks from Office 365 to PST format.
Supports Multiple File Formats – You can use this tool to export emails from Office 365 in multiple file formats. Some of them are mentioned here:
- PST: Export Office 365 mailbox contents such as emails, calendar, contacts into Microsoft Outlook.
- EML: Export messages from Office 365 into EML file and access them in Mozilla Thunderbird, Apple Mail etc. in a seamless manner.
- MSG: Office 365 emails can also be accessed in Microsoft Outlook 2016 and its previous versions.
Pause and Resume Export Process – If necessary, this function allows the user to pause and resume the currently ongoing process at any time. This feature comes into use if you want to utilize the internet bandwidth in some other task. Users can pause the task in such situations and continue at a later time. The process starts from where it stopped or paused, not from where it started.
Important Note: Users can also export Office 365 archive mailbox to PST using this utility.
After all the features, let’s see the working steps of software:
Step 1: First, download and install the software in your machine.

Step 2: Now, enter Office 365 login credentials.

Step 3: Click on Export for O365 bulk export.

Step 4: Now, successfully extract data from Office 365.

Final Say
Hence, we would like to conclude that in this write up we have discussed how to export emails from Office 365 to PST using manual solution. However, the manual solution is very lengthy and hard for non-technical users to opt. So, we have also suggested a professional solution which is quick, reliable and easy to use.
FAQs
A. Yes, the tool offers you date-range filter with the help of which you can filter your emails.
A. Yes, there is an option of selective items migration. You can select only emails and deselect other mailbox items.
Related Posts


