[Solved] Migrate Emails to G Suite With Data Migration Service (DMS)
This blog contains step-by-step process to migrate emails to G Suite with data migration service with screenshot. For the working of this solution you require Admin account of G Suite and list of users whose data need to be migrated. We will also cover some of the limitations of this method and provide an automated solution to over the limitation faced by users.
What is Data Migration Service (DMS)?
Google provides a migration service in G Suite for letting its user to migrate emails to G Suite domain without any hassle. All those G Suite user who are having G Suite Basic edition or above get the Data migration service in-build in their G Suite admin Console. It is a free application provided by Google for its users to migrate emails, contact & calendars data.
Benefits of data migration service are as follows:
- Doesn’t require installation of any tool – One can control everything via Admin console.
- Sequential, self guiding steps of migration.
- Capable for migrate emails from multiple domains to G Suite domain.
Steps to Migrate Emails to G Suite With Data Migration Service
1. Visit https://admin.google.com and login into your G Suite Administrator Account via Admin credentials
2. From the Admin Panel, select the Data Migration tab from list of other application, as shown in the figure below.

3. Now in data migration panel, you can get further info about the migration service. Or, simply click on SET UP DATA MIGRATION link.

4. Next form Configure Data Migration Service window, you will get list of information. Here, from migration source section, select “Source Domain” from drop-down menu.
5. After selecting source platform, select the Category as Emails and select the Connection protocol as “Auto Select (Recommended)”.
6. Next in the Role Account, enter the Admin Id and Password of Source domain and then click on Start button to migrate emails to G Suite.

7. From Additional Settings and Add user screen, select the Start Date for the migration & Migration options.
- Start Date: This option will migrate emails to G Suite from selected start date to till date.
- Migration Options: This option allows to include/exclude Send/Deleted/Specific folders.

8. After completion of Additional configuration, click on the Select User option at the bottom of migration screen.

9. Next, click on Add User option and this will provide two more options:
- Add User: This option can be used when only one user account emails need to be migrate to G Suite. In this option, Admin just need to enter the Email id & password of source account and select the destination G Suite user account.

- Bulk Upload CSV: This option allows to migrate emails of multiple user accounts into G Suite. Admin can create a CSV file that maps source and destination accounts and click on Attach option to upload that file. Finally click on UPLOAD AND START MIGRATION button to begin the migration.

10. After this migration process will begin and data migration service will provide the live migration status on screen.

11. Once the migration is complete, click on More button and download Email Report containing the details about migrated data.

12. At the end, from the More tab, just click on Exit Migration button to finish the service.
The above migration steps only for migrating emails to G Suite account. Same process need to be repeat for migration of contacts & calendar.
Limitation on Data Migration Service
Though, Admin can migrate emails to G Suite with Data migration service, there are some limitation of it, some of them are as follows:
- Admin can migrate either email, or calendar or contacts at a time
- The migration process is quite slow
- Doesn’t provide option to migrate Drive data
- Issue of data migration stuck at 99 reported by many Admins
- Can’t filter the migrate according to date-range
Alternative of Data Migration Service to Migrate Emails to G Suite
As you may have seen that the data migration service steps are too complex and there are many limitation to it. It is recommended by experts to use automate tool when need to perform migration of large number of users. For such migration, Best Cloud to Cloud Migration Software from SysTools is the best one. This tool not only overcomes all the limitations of data migration service, but also provide some exceptional features that will help Admin during the migration process.
Benefits of using Automated Tool
- Migrate emails, contacts, calendars and drive data simultaneously
- Simple to user tool with complete guide in-build itself.
- Easily migrate emails from G Suite or Office 365 to G Suite domain.
- Delta migration feature to skip already migrated emails in previous attempt.
- Automatically fetches source user account ids
- Doesn’t require user account password for migration
- Tested with migration speed upto 40 GB per hour.
- Retry, Re-Run Full migration option failed or skipped items.
- Generates dual report after the migration completes
Steps to migrate emails to G Suite with automate tool:
1. Click on the Download button to get the tool setup, and Install it.
2. First launch the tool and go to Settings tab. Next, click on Activate button & enter the activation code to make it full-version. If you don’t have the activation code, then click on how to activate button.

3. Next thing is to select the desired Source platform and click on G Suite from destination section.

4. From workload section, select the Category as Emails or others (optional) and set Date-Range filter to migrate emails of specific data range.
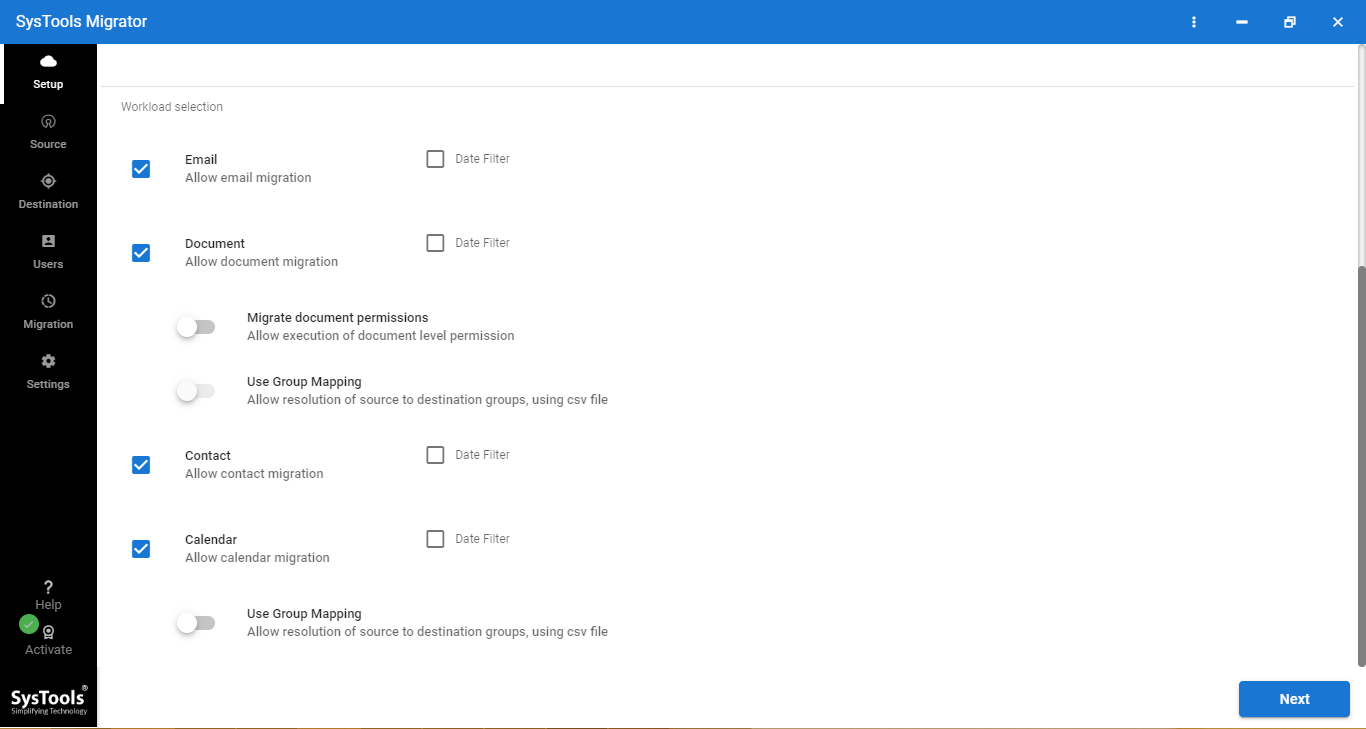
5. Next, In source tab, enter the source Admin id and enter the Application ids. If you don’t have the application id then click on Project Settings link at the below.

6. Now, in destination tab, enter the G Suite Admin Id, Application id & p12 file path. If you don’t have these, then click on Project Settings tab to create one.

7. From User tab, choose the option for source and destination user accounts mapping.
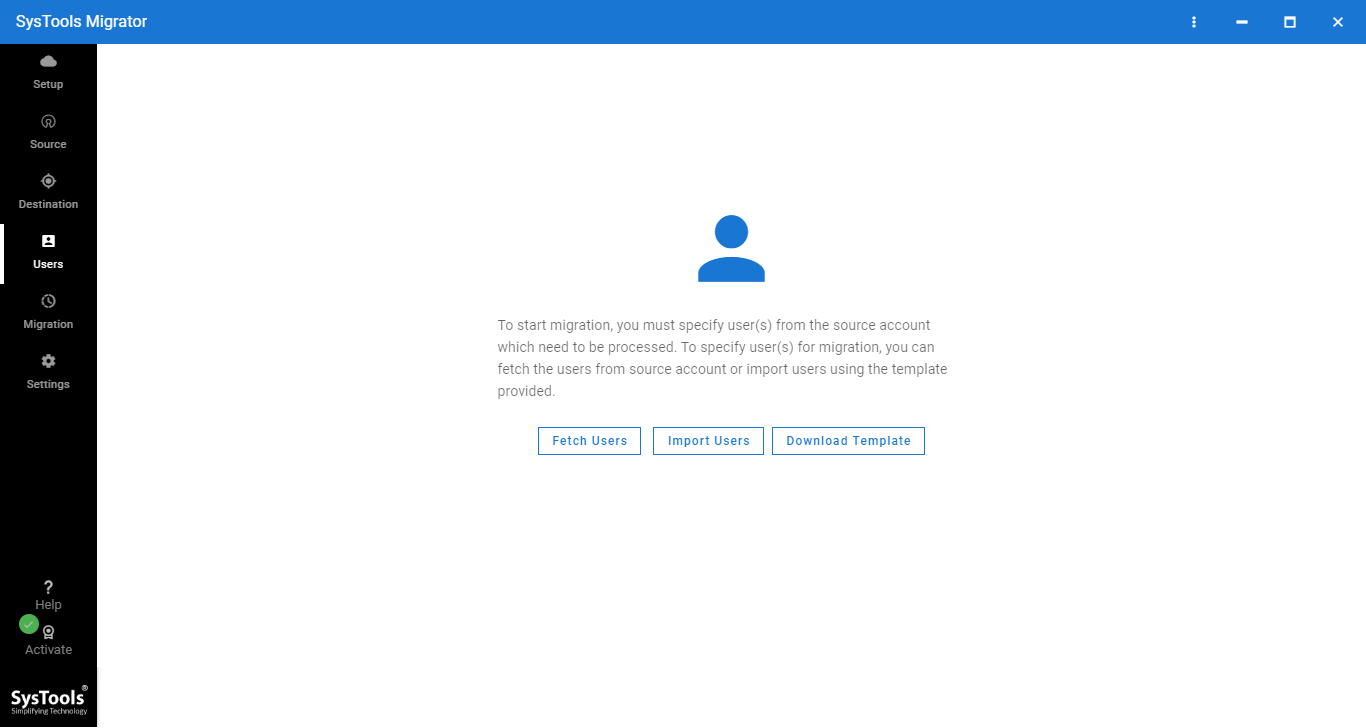
8. Click on the checkbox to select the user accounts for migration and Apply priority. After that click on Validate button for the authentication of user account.
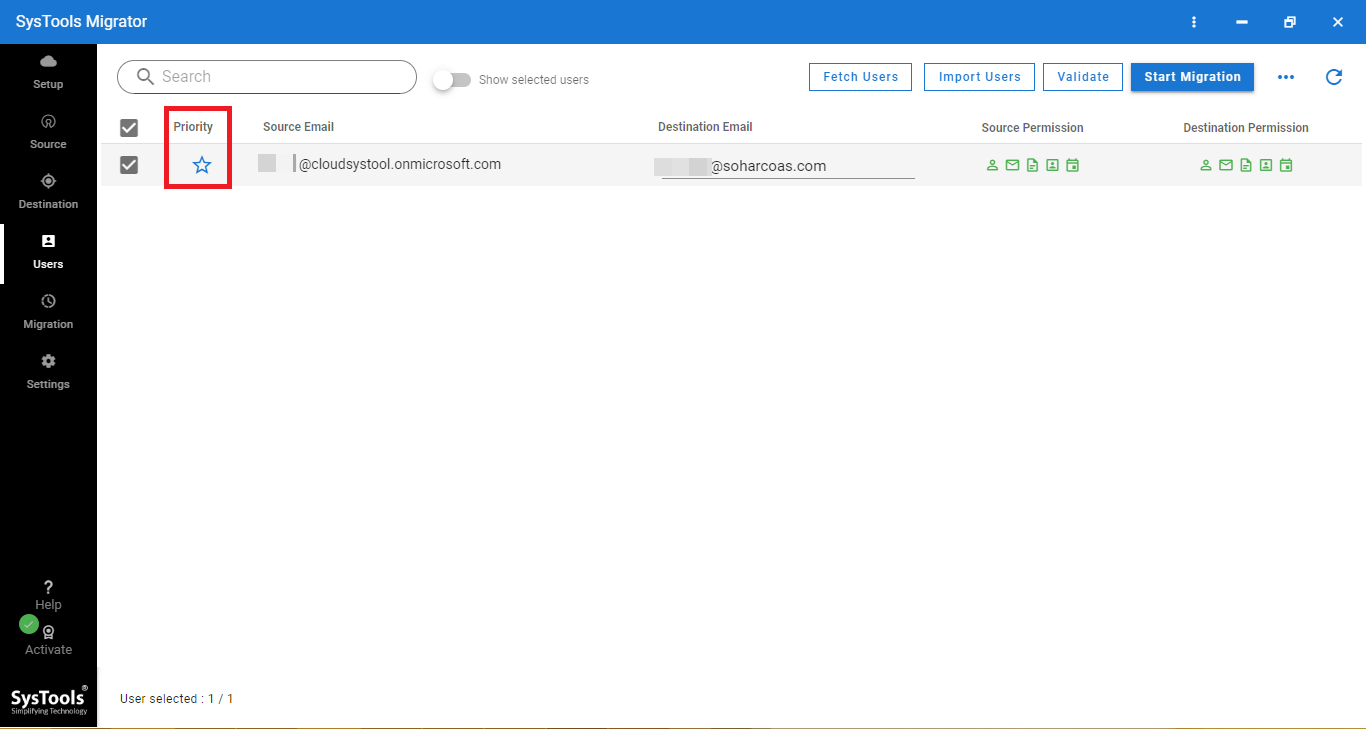
9. Finally click on Start Migration button check the available licenses and then click on Start button to begin the migration.

10. After completion of migration, Download Report to get the details of migrated data. Choose the Re-Run Migration options to migrate data again.
Conclusion
In the above sections we have explained methods to migrate emails to G Suite with the data migration service and automated tool. Automated tool is recommend to overcome the limitation of DMS as mentioned above. First test the tool by using its free demo version. It will allows you to migrate complete data of 2 users accounts.
Related Posts

